Woodworker's Journal 2004 Summer, страница 73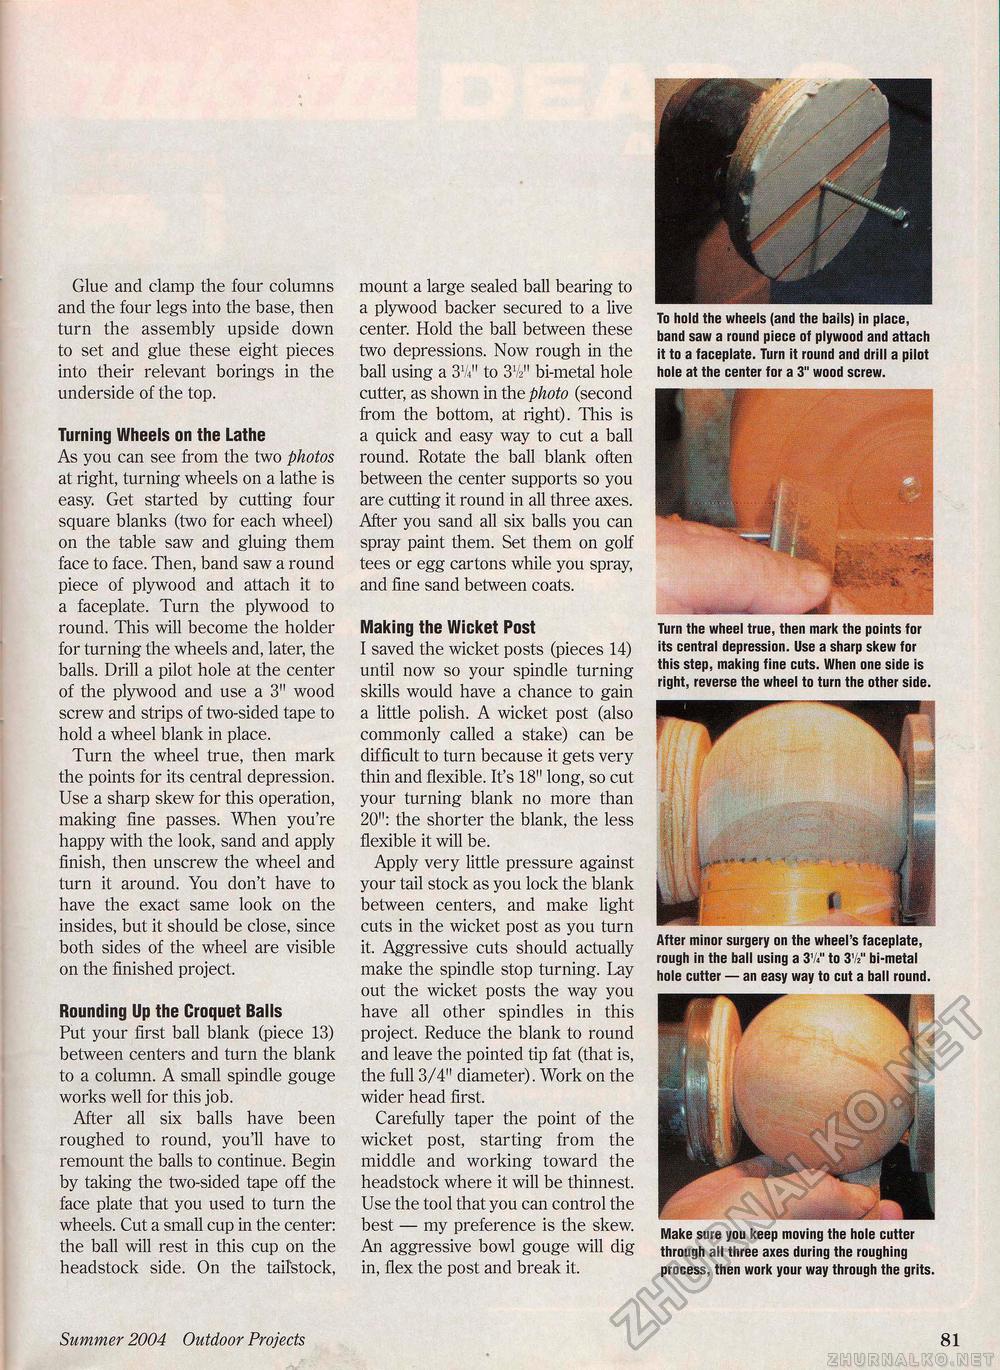
Glue and clamp the four columns and the four legs into the base, then turn the assembly upside down to set and glue these eight pieces into their relevant borings in the underside of the top. Turning Wheels on the Lathe As you can see from the two photos at right, turning wheels on a lathe is easy. Get started by cutting four square blanks (two for each wheel) on the table saw and gluing them face to face. Then, band saw a round piece of plywood and attach it to a faceplate. Turn the plywood to round. This will become the holder for turning the wheels and, later, the balls. Drill a pilot hole at the center of the plywood and use a 3" wood screw and strips of two-sided tape to hold a wheel blank in place. Turn the wheel true, then mark the points for its central depression. Use a sharp skew for this operation, making fine passes. When you're happy with the look, sand and apply finish, then unscrew the wheel and turn it around. You don't have to have the exact same look on the insides, but it should be close, since both sides of the wheel are visible on the finished project. Rounding Up the Croquet Balls Put your first ball blank (piece 13) between centers and turn the blank to a column. A small spindle gouge works well for this job. After all six balls have been roughed to round, you'll have to remount the balls to continue. Begin by taking the two-sided tape off the face plate that you used to turn the wheels. Cut a small cup in the center: the ball will rest in this cup on the headstock side. On the tailstock, mount a large sealed ball bearing to a plywood backer secured to a live center. Hold the ball between these two depressions. Now rough in the ball using a 3U" to 3V211 bi-metal hole cutter, as shown in the photo (second from the bottom, at right). This is a quick and easy way to cut a ball round. Rotate the ball blank often between the center supports so you are cutting it round in all three axes. After you sand all six balls you can spray paint them. Set them on golf tees or egg cartons while you spray, and fine sand between coats. Making the Wicket Post I saved the wicket posts (pieces 14) until now so your spindle turning skills would have a chance to gain a little polish. A wicket post (also commonly called a stake) can be difficult to turn because it gets very thin and flexible. It's 18" long, so cut your turning blank no more than 20": the shorter the blank, the less flexible it will be. Apply very little pressure against your tail stock as you lock the blank between centers, and make light cuts in the wicket post as you turn it. Aggressive cuts should actually make the spindle stop turning. Lay out the wicket posts the way you have all other spindles in this project. Reduce the blank to round and leave the pointed tip fat (that is, the full 3/4" diameter). Work on the wider head first. Carefully taper the point of the wicket post, starting from the middle and working toward the headstock where it will be thinnest. Use the tool that you can control the best — my preference is the skew. An aggressive bowl gouge will dig in, flex the post and break it. To hold the wheels (and the balls) in place, band saw a round piece of plywood and attach it to a faceplate. Turn it round and drill a pilot hole at the center for a 3" wood screw. Turn the wheel true, then mark the points for its central depression. Use a sharp skew for this step, making fine cuts. When one side is right, reverse the wheel to turn the other side. After minor surgery on the wheel's faceplate, rough in the ball using a 3V«" to 31/" bi-metal hole cutter — an easy way to cut a ball round. Make sure you keep moving the hole cutter through all three axes during the roughing process, then work your way through the grits. Summer 2004 Outdoor Projects 81 |


